
Certificate-Based Authentication
Simplifying Secure Access for Developers
Certificate-based authentication is a robust security mechanism that leverages public key infrastructure (PKI) to verify the identities of API users in a network. In a certificate-based authentication system, each user is issued with a pair of cryptographic keys: a public key and a private key.
To proceed with Certificate-Based Authentication, follow the steps below:
Prerequisites
- You must have a Sandbox Verto account. If you don't have one, refer to Create a sandbox account.
Step 1 - Generate Client ID and API Key
To access your Client ID and API Key, do the following steps:
-
Log in to your Verto sandbox account.
-
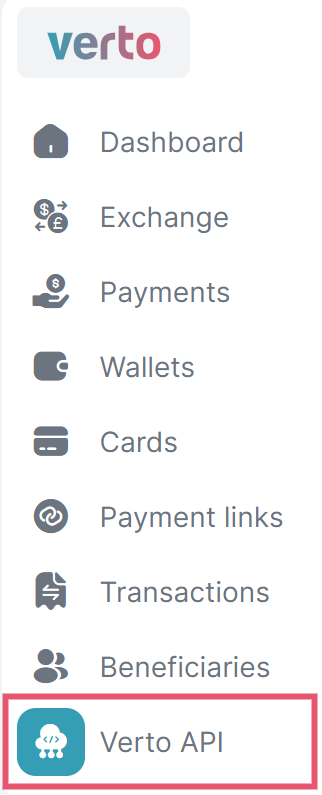
Hover the mouse over the icons on the left side of the screen, and select Verto API.
 Note
NoteIf you don't see Verto API that means your account is not yet activated to access the APIs. Please send an email to [email protected] or book a meeting here.
-
On the top-right corner, select Generate new api key.
A new screen will appear that ask you to verify your identity.

-
Enter your 6-digit OTP, and select Continue.
Your
Client IdandApi Keywill be generated and displayed on the screen. -
Click on the copy icon and save the
client IDandApi Keysecurely for your reference.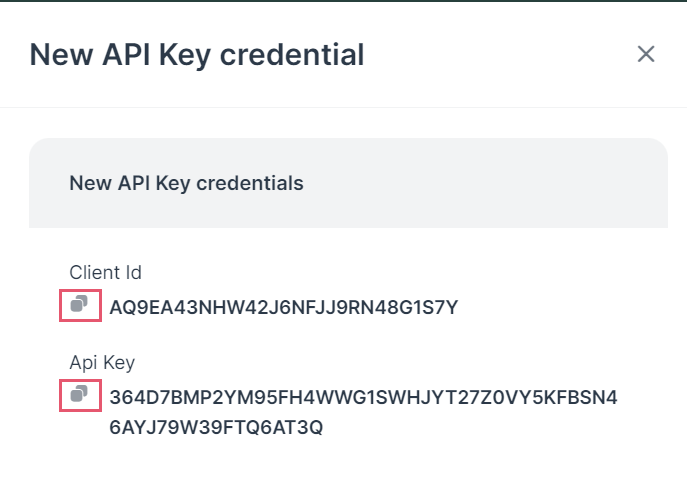 Caution
- If you lost your existing API key or were unable to save it; then you need to generate a new one by following the above steps.
- A maximum of 3 API keys can be generated. If you've reached the limits, delete an existing one to generate a new API key.
-
Select Done to close the pop-up screen.
You can see the generated Client ID on the screen with the staus as
Active.
Step 2 - Generate Public Key
To access your Public Key, do the following steps:
-
Hover the mouse over the icons on the left side of the screen, and select Verto API.
-
Note
If you don't see Verto API that means your account is not yet activated to access the APIs. Please send an email to [email protected] or book a meeting here.
-
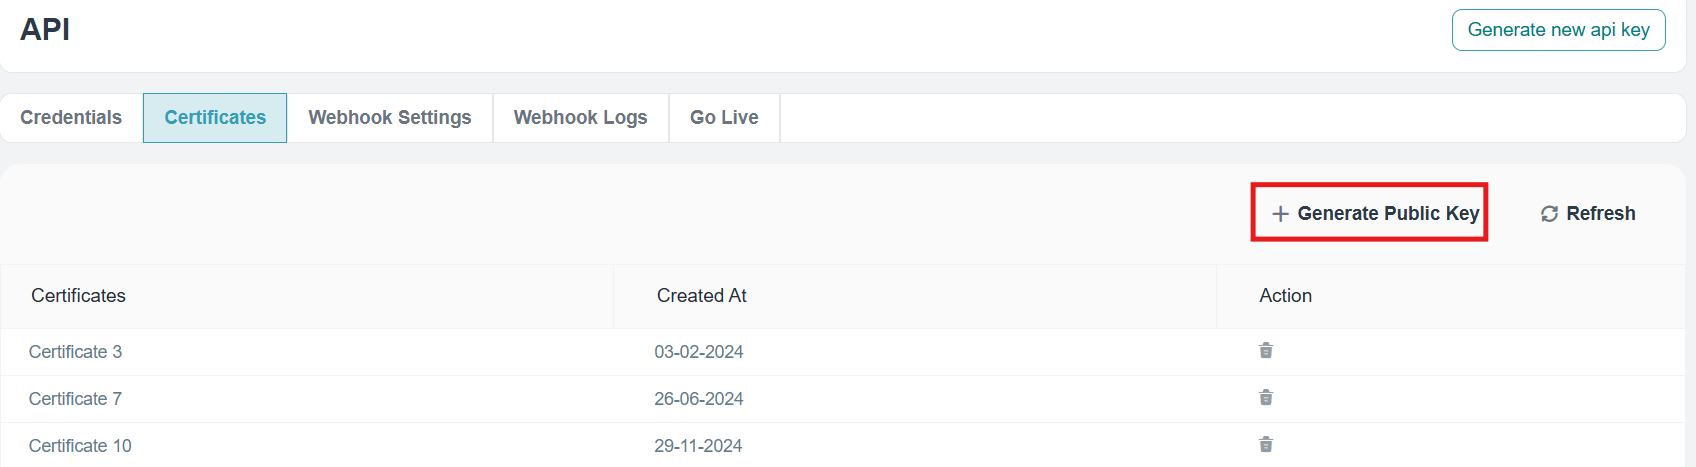
Click Certificates, and then select Generate Public Key.
A new screen will appear that asks you to verify your identity.
-
Enter your 6-digit OTP, and select Continue.
Your
Public API Keywill be generated and displayed on the screen. -
Click on the copy icon to save the
Public Api Keysecurely for your reference.-----BEGIN PUBLIC KEY----- MIIBIjANBgkqhkiG9w0BAQEFAAOCAQ8AMIIBCgKCAQEAzgJY5V1N7b4cA0N/sEYZ 3tDWgRfIvgh6/BWaqRM1PbDtmM9iBDtI30m4CEXiG75CUJx8pRd/Bl3dMHc9vb4r d0QroZwSm+4gBBaQhUpX3FVZmvI56N1CpUKZL3e8Upvg3tth8Og2jWMAemzuz5e8 ftInsycdPlvXZc44joL8/g75/kE8SPjOcn5/x7kOExQCufnT4RXw/NH9YPifY7N6 C5+TQakx6OY+k6h9T1KFGk36gs3O6jeAF0q4u6gHPHZvgIwKtQ2H1U1G/ZJINovg JBoFCMsMaX8VLW5HE5Wrf/Vo1zm66eIcEn8XphI3jBnoLJLB/yzx1t5xrYgdMrXb JwIDAQAB -----END PUBLIC KEY-----Caution- If you lost your existing Public key or were unable to save it; then you need to generate a new one by following the above steps.
- A maximum of 3 Public keys can be generated. If you've reached the limits, delete an existing one to generate a new Public key.
-
Select Done to close the pop-up screen.
You can see the generated Client ID on the screen with the status as
Active.
Step 3 - Encrypt the API key
Run the script below to get the encrypted key.
Here's an example in JavaScript, Python, and C#:
const fs = require('fs');
const crypto = require('crypto');
// const privateKey = fs.readFileSync('private.pem', 'utf-8');
const publicKey = fs.readFileSync('public.pem', 'utf-8');
const currentTimestamp = new Date().valueOf();
// Example of api key 8X7DYK0D0ZMAFYMSQG1XNH6MJN7Q22D6D60TEAMJR9NNM8MFZEBQJYAR
const apiKey = `<USER_API_KEY>:${currentTimestamp}`;
// Example of updated apiKey after addingTimeStamp 8X7DYK0D0ZMAFYMSQG1XNH6MJN7Q22D6D60TEAMJR9NNM8MFZEBQJYAR:1732864715175
const encryptedData = crypto.publicEncrypt(
{
key: publicKey,
oaepHash: 'sha512'
},
apiKey
);
console.log('Encrypted Data:', encryptedData.toString('base64'));
import base64
from cryptography.hazmat.backends import default_backend
from cryptography.hazmat.primitives import serialization, hashes
from cryptography.hazmat.primitives.asymmetric import padding
import time
# Read the public key from file
with open('public.pem', 'rb') as key_file:
public_key = serialization.load_pem_public_key(
key_file.read(),
backend=default_backend()
)
# Set the API key
# Example of api key 130WHXWE6M2S0JVFDCPXFR8Q4HYJ6T2XBNRX6MMMYJR3H20PY0M78V3
api_key = '<USER_API_KEY>'
milliseconds = int(time.time() * 1000)
api_key = api_key + ':' + str(milliseconds)
# Encrypt the data
encrypted_data = public_key.encrypt(
api_key.encode('utf-8'),
padding.OAEP(
mgf=padding.MGF1(algorithm=hashes.SHA512()),
algorithm=hashes.SHA512(),
label=None
)
)
# Convert the encrypted data to Base64
encoded_data = base64.b64encode(encrypted_data)
# Print the result
print('Encrypted Data (Base64):', encoded_data.decode('utf-8'))using System;
using System.IO;
using System.Security.Cryptography;
using System.Text;
class Program
{
static void Main(string[] args)
{
// Load the public key from the PEM file
string publicKeyPath = "public.pem";
string publicKey = File.ReadAllText(publicKeyPath);
// Example API key
string userApiKey = "<USER_API_KEY>";
long currentTimestamp = DateTimeOffset.UtcNow.ToUnixTimeMilliseconds();
string apiKey = $"{userApiKey}:{currentTimestamp}";
// Encrypt the API key
byte[] encryptedData = EncryptData(apiKey, publicKey);
// Convert to Base64 and display
string encryptedBase64 = Convert.ToBase64String(encryptedData);
Console.WriteLine("Encrypted Data: " + encryptedBase64);
}
static byte[] EncryptData(string data, string publicKey)
{
using (RSA rsa = RSA.Create())
{
// Import the public key
rsa.ImportFromPem(publicKey.ToCharArray());
// Encrypt the data using OAEP with SHA-512
byte[] dataBytes = Encoding.UTF8.GetBytes(data);
byte[] encryptedData = rsa.Encrypt(dataBytes, RSAEncryptionPadding.OaepSHA512);
return encryptedData;
}
}
}In the above code snippets, replace the following values:
- The
USER_API_KEYwith the API key value received in Step 1. - The
publicKeywith the Public key value received in Step 2.
Encrypted Data: qNQf4iWmksiy3iG4IBFWmp6AUU14A96wtAdNwf4wQR1KDZVzRblN6C6wY1RK+Qacyt6+mHAzVTUD2L8Yrw/63Eww/LU9stSnoVV38e2s+/VipMz6jykttOfKebhD/lcOuecS06FKaP42eGBX8Q1DuMalmMBP2jKFajERR0JcbFrcNvipUJUJ9TQWpsbMSXsrimrSTdUvaxjVUOewx2AnVMrGOtidOuTJLci6TnMtt5LtLFLClQ9+B2htpor4ncAu1BoIYd57nnpJ/08oNOHujoMdLX7a6fibKMFhb6t5v9pVmOQN3u4wQYvd0AuQv1ldzZQwIcQ2DATiykb1uHDE3w==
NoteYou need to add this
encrypted API keyin the request body to call the Login API.The
encrypted API keyis valid for30 seconds.
Step 4 - Enter the required credential
You need to provide the required clientId and encrypted apikey along with the mode as apiKey in the request body, as shown below.
This includes the JSON object being sent in the body of the request. It contains:
clientId: The identifier for the client application, which is required for authentication.apiKey: The key that provides permission to access the API, serving as a password of sorts.mode: Indicates the method of authentication; in this instance, it's set to "apiKey", meaning the server should authenticate the request using the provided API key.
curl --request POST \
--url https://api-v3-sandbox.vertofx.com/users/login \
--header 'accept: application/json' \
--header 'content-type: application/json' \
--data '
{
"clientId": "ACYK8A0FSA4E2YN0BHBEX8JP20NF",
"apiKey": "3E4XZCW50S4BX7M7Q16MJZJDWFXEFN8ZMX77CMM9XBGSF3XC5K1GHCP0",
"mode": "apiKey"
}
'{
"success": true,
"token": "eyJhbGciOiJIUzI1NiIsInR5cCI6IkpXVCJ9.eyJzZXNzaW9uSWQiOiI0NjI1YWVkOC0xMmZmLTIzMmQtZWE0OC0yYWYzMjllMGVjNTEiLCJsb2dpbk1vZGUiOiJhcGlLZXkiLCJpZCI6NTI2LCJjb21wYW55SWQiOjUyNSwicHJvZmlsZUlkIjo1MjYsInVzZXJSZWNvcmRJZCI6MTQ4LCJyb2xlIjoiTk9STUFMX0NMSUVOVCIsInJvbGVOYW1lIjoiTXVsdGkgVXNlciIsInJlZmVyZW5jZSI6IlZVLTI5MTEyMDIyLTE2MS1VMSIsInByb2ZpbGVSZWZlcmVuY2UiOiJWVS0yOTExMjAyMi0xNjEtVTEiLCJjb21wYW55UmVmZXJlbmNlIjoiVlUtMjkxMTIwMjItMTYxIiwiY29tcGFueU5hbWUiOiJIZXlQYXkiLCJyYXRlTGltaXQiOjIwMDAsImlhdCI6MTcyMTEyMDIwNywiZXhwIjoxNzIxMTIzODA3fQ.nLOVQFjQuAOAjKRU5lH49BCjdKaO3OpDOwOImdHCPqg"
}Updated over 1 year ago