
Create a webhook subscription
Choose the events (topics) you want and the URL Verto should send them to.
A subscription tells Verto which events (topics) to send and which URL to send them to. You can create as many as you need, for example one per system or product area.
Steps
- On the Verto API page, open the Webhook subscriptions tab and click Add subscription. You can also use Add subscription on the go-live checklist.
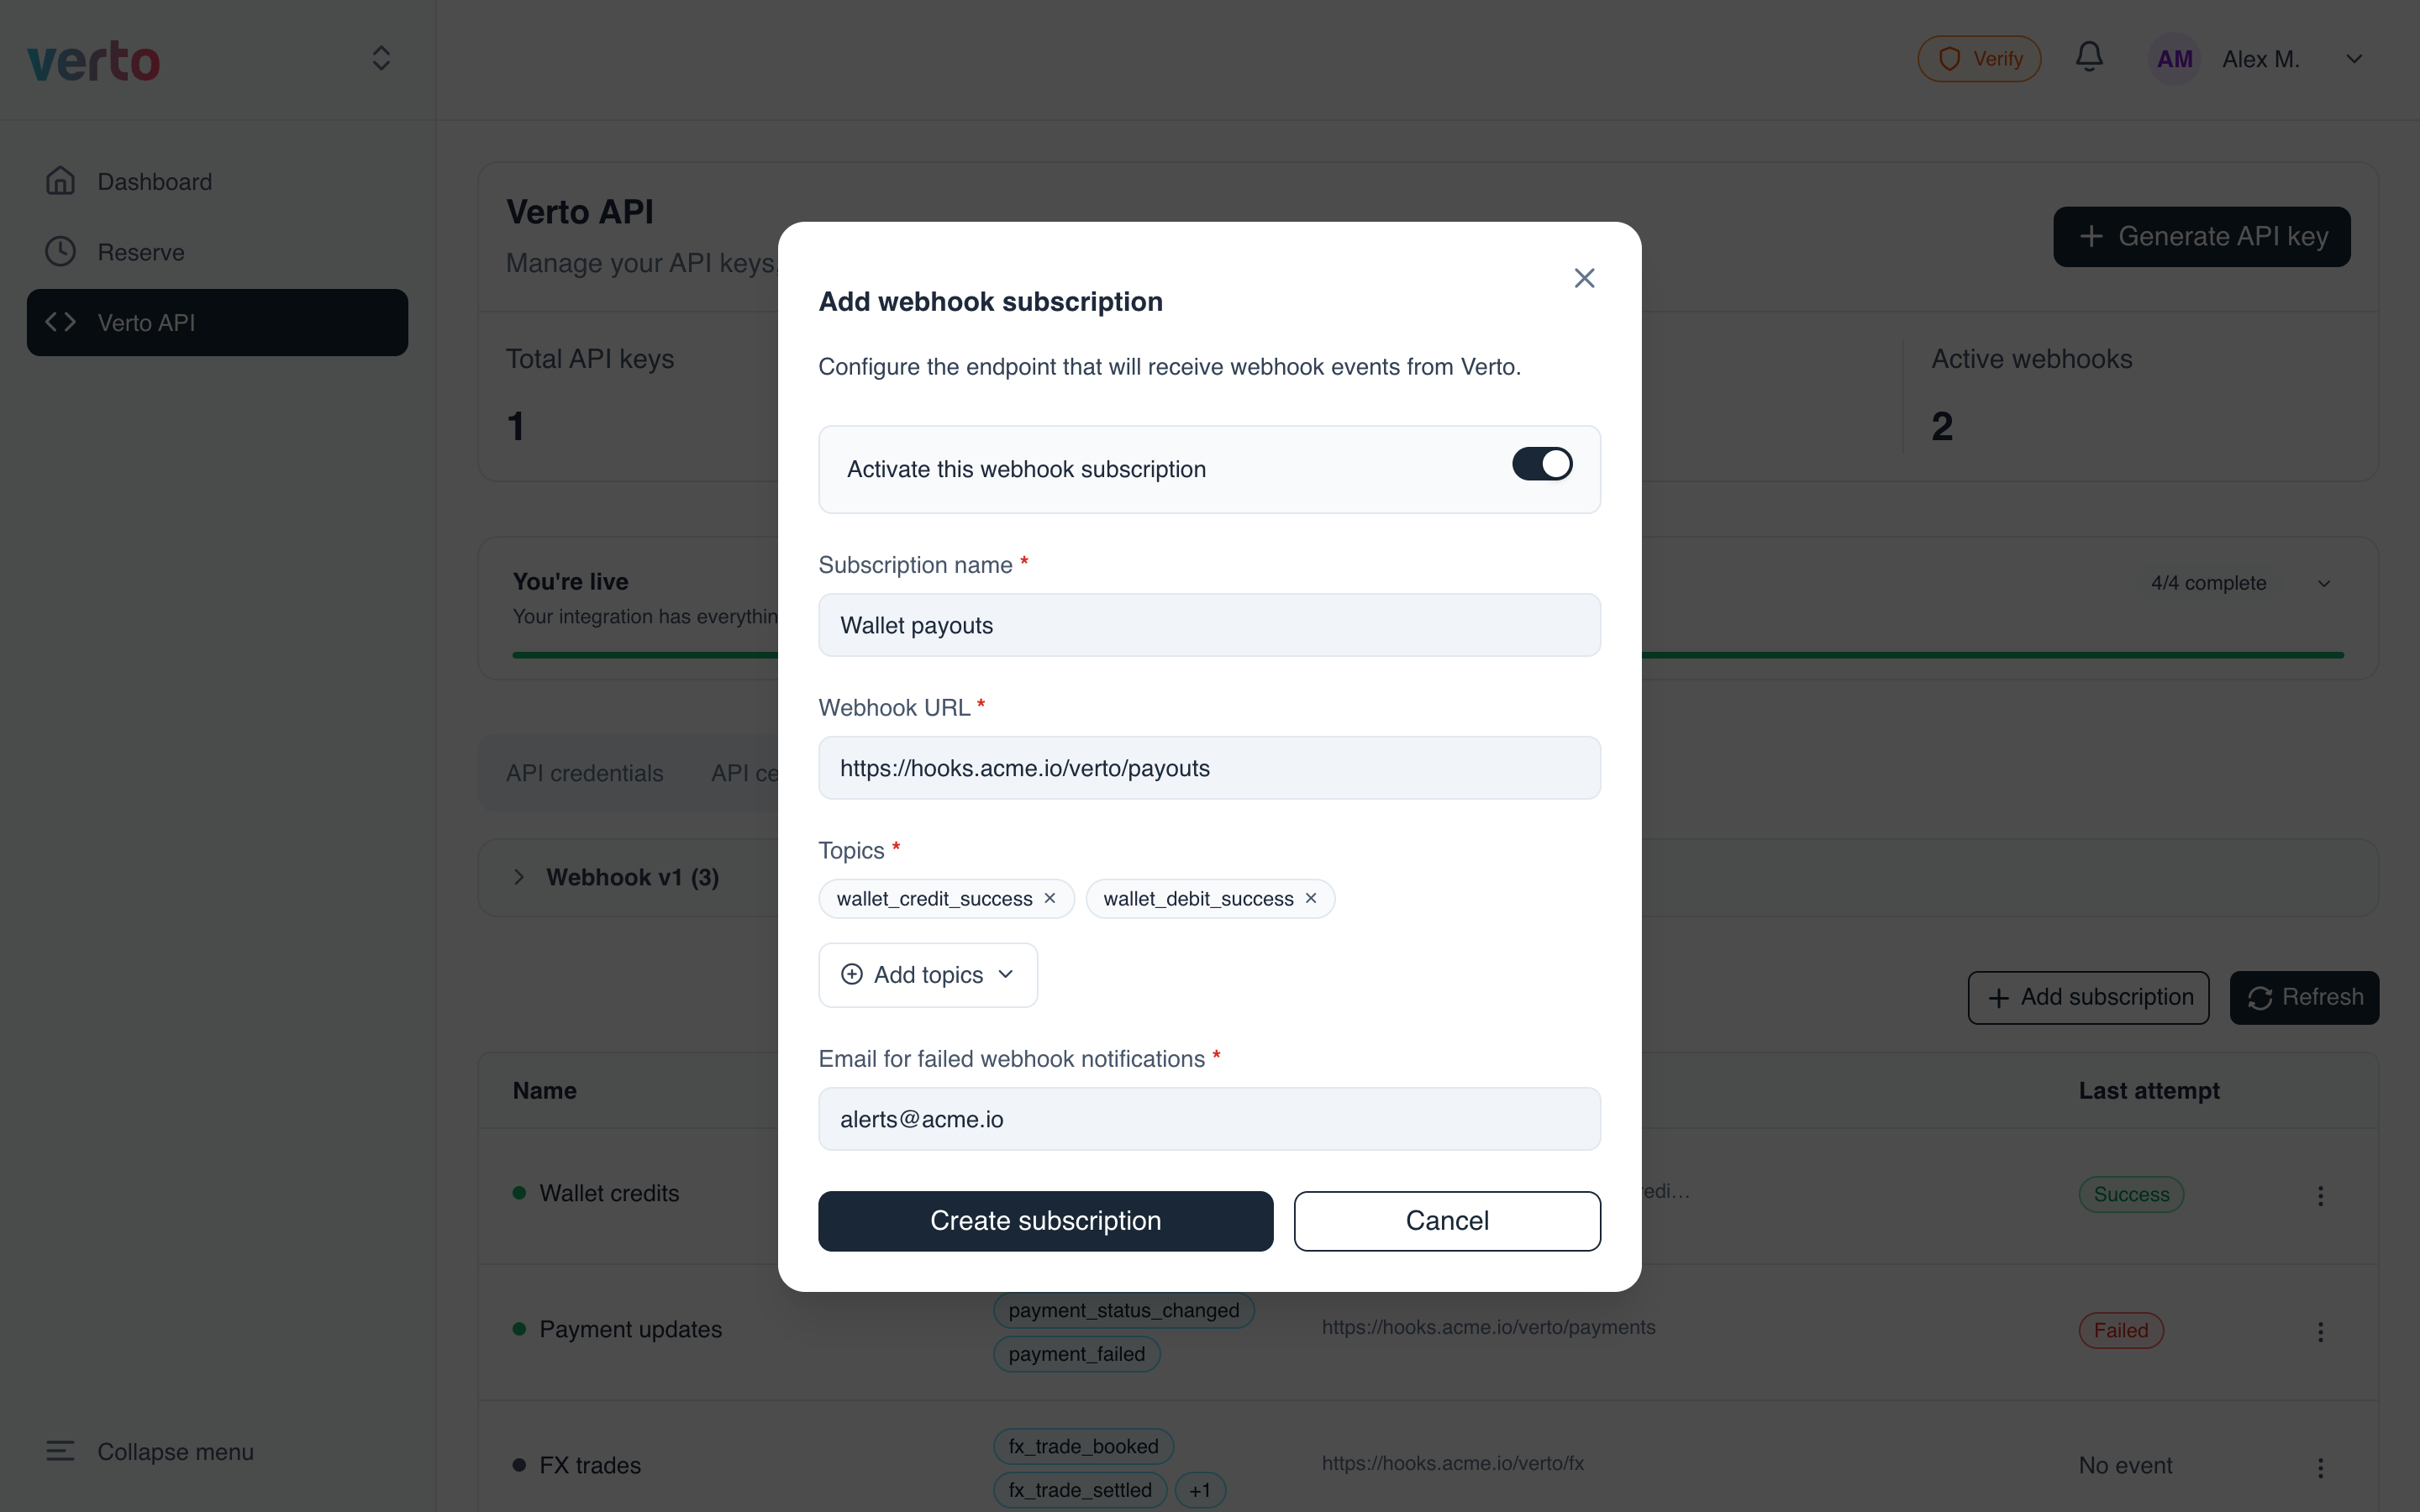
- Fill in the form:
| Field | What to enter | Rules |
|---|---|---|
| Activate this webhook subscription | Leave it on to start receiving events now. Turn it off to save the subscription paused. | On by default |
| Subscription name | A label for your team, e.g. Wallet payouts | Required |
| Webhook URL | Your endpoint, e.g. https://hooks.acme.io/verto/payouts | Must be a full URL starting with https:// (or http://) with a real domain. localhost and bare numbers are rejected. |
| Topics | The events to receive (see below) | At least one |
| Email for failed webhook notifications | Who Verto should email when deliveries fail | Required, must be a valid email address |
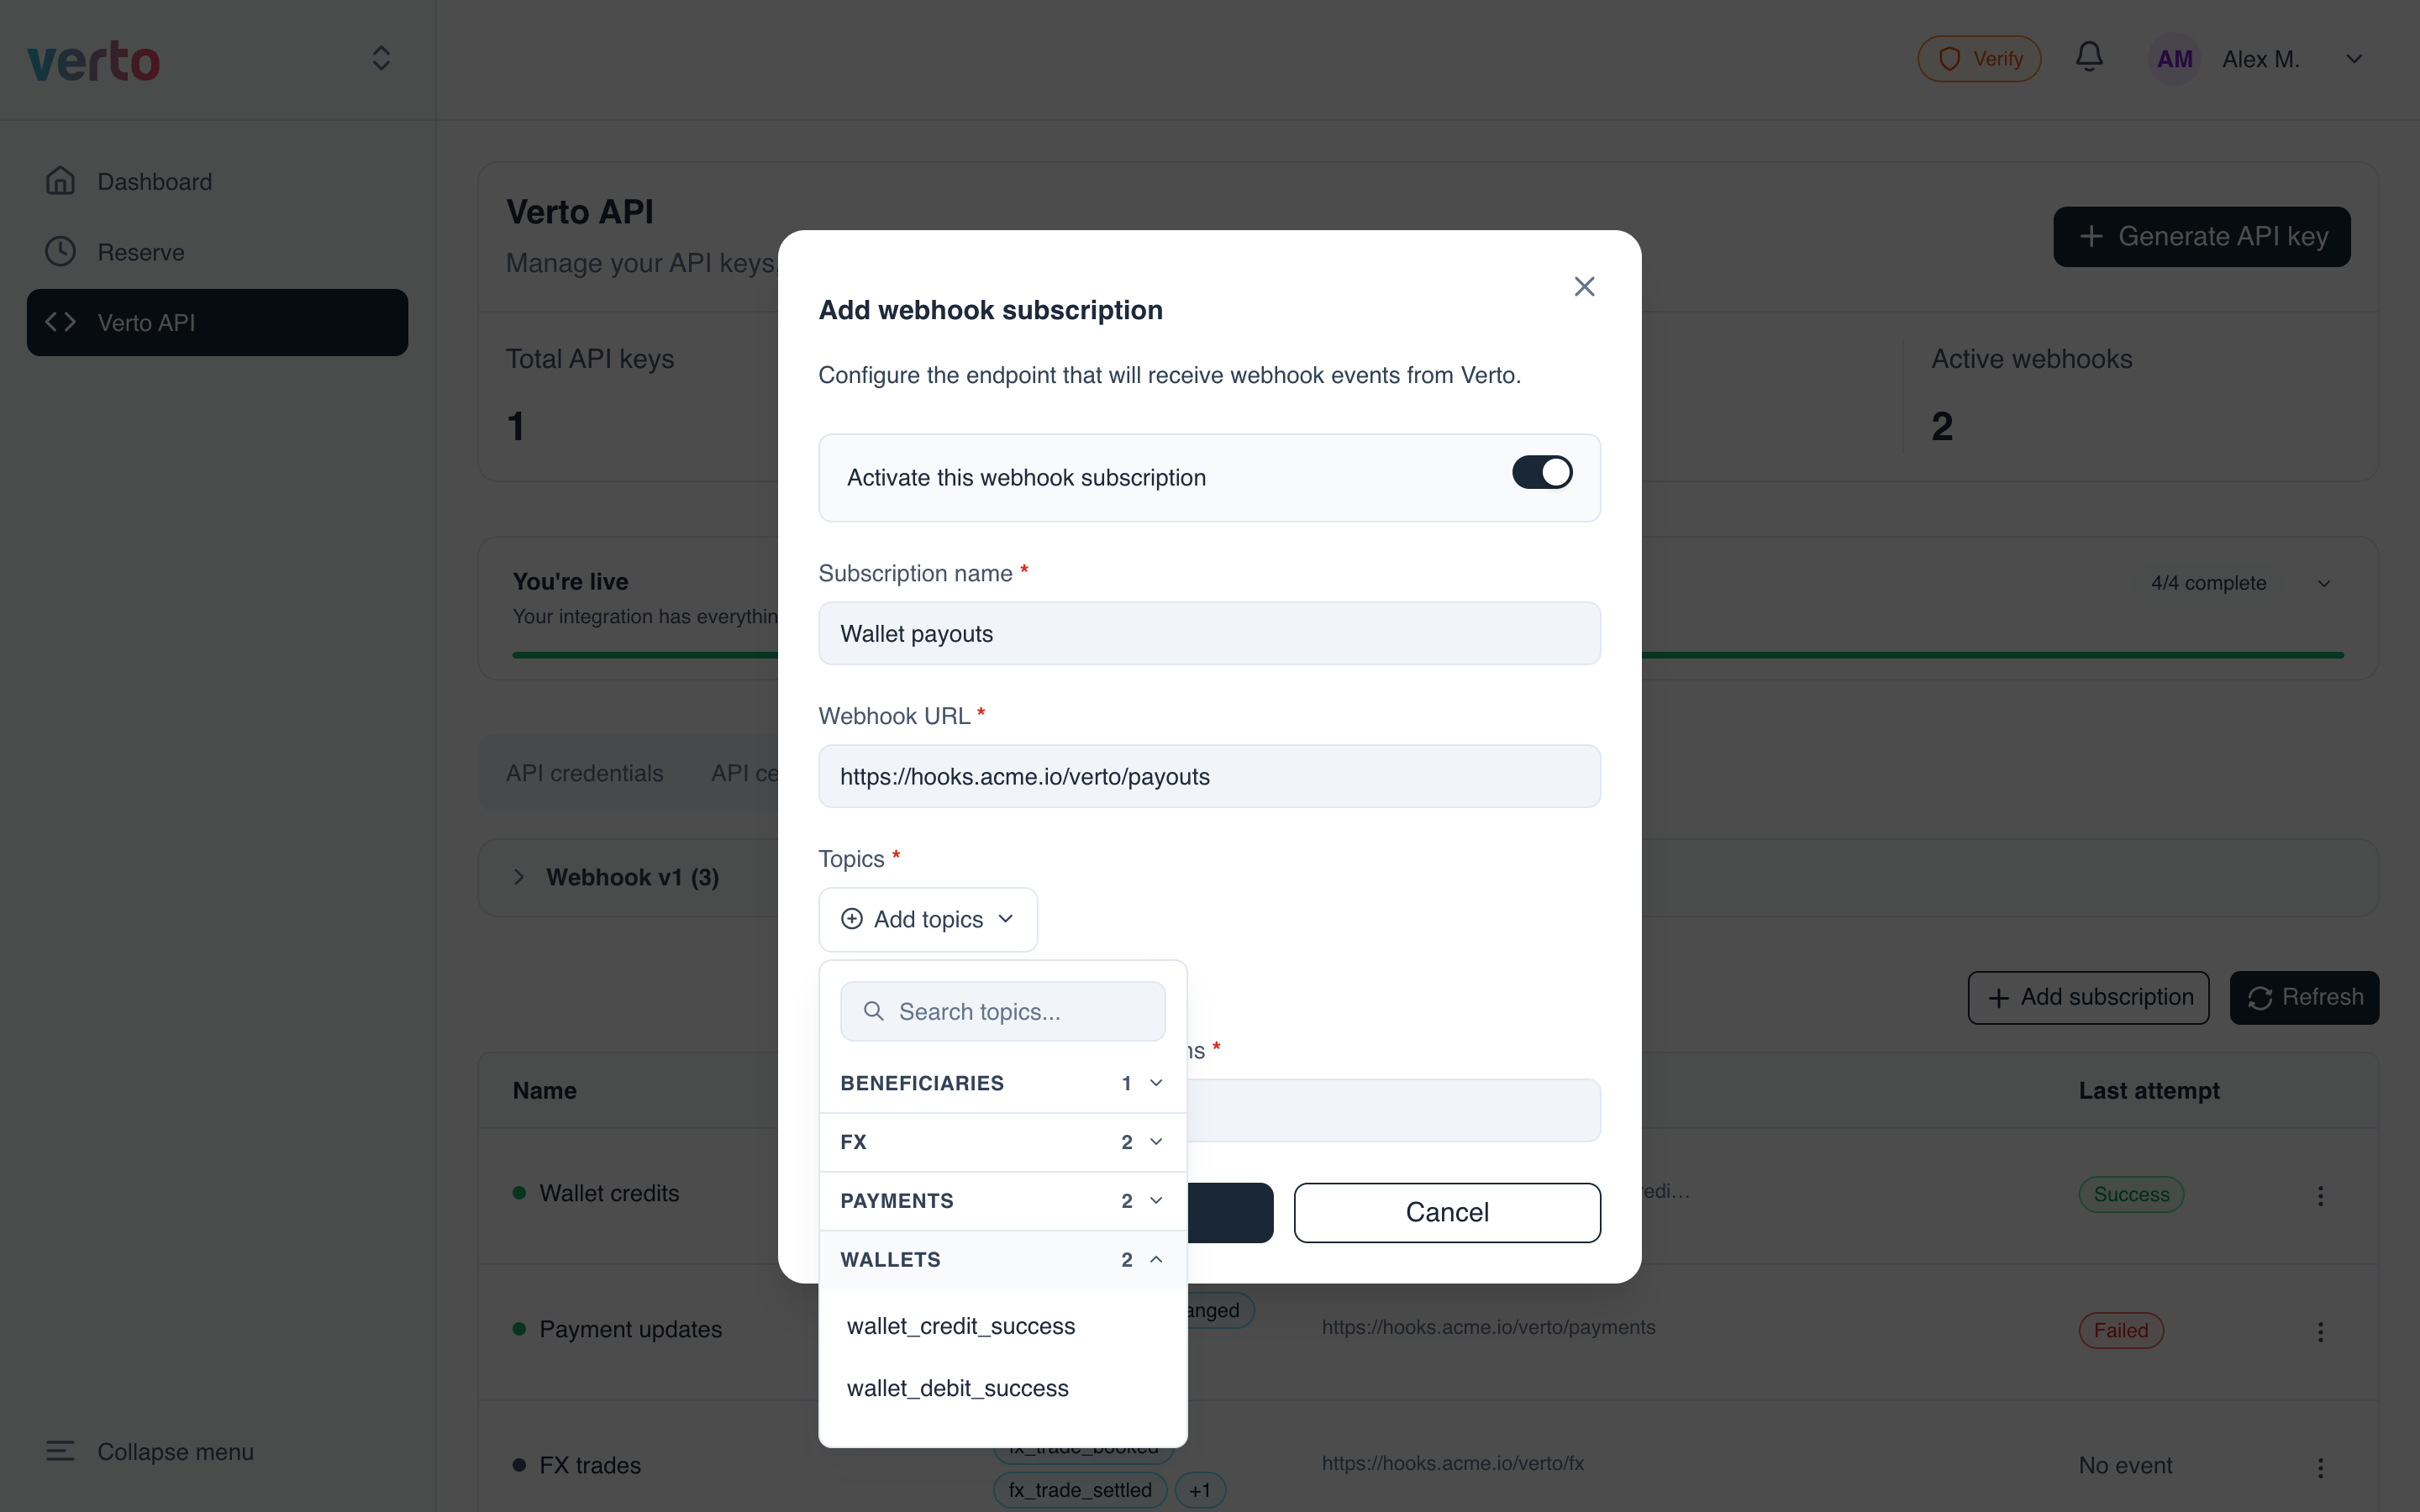
- Click Add topics to open the topic picker.
- Topics are grouped by product area (Wallets, Payments, FX, …). Click a group to expand it, then click each topic you want.
- Use Search topics… to filter the list.
- Each chosen topic appears as a chip. Click × on a chip to remove it.
- Click Create subscription.
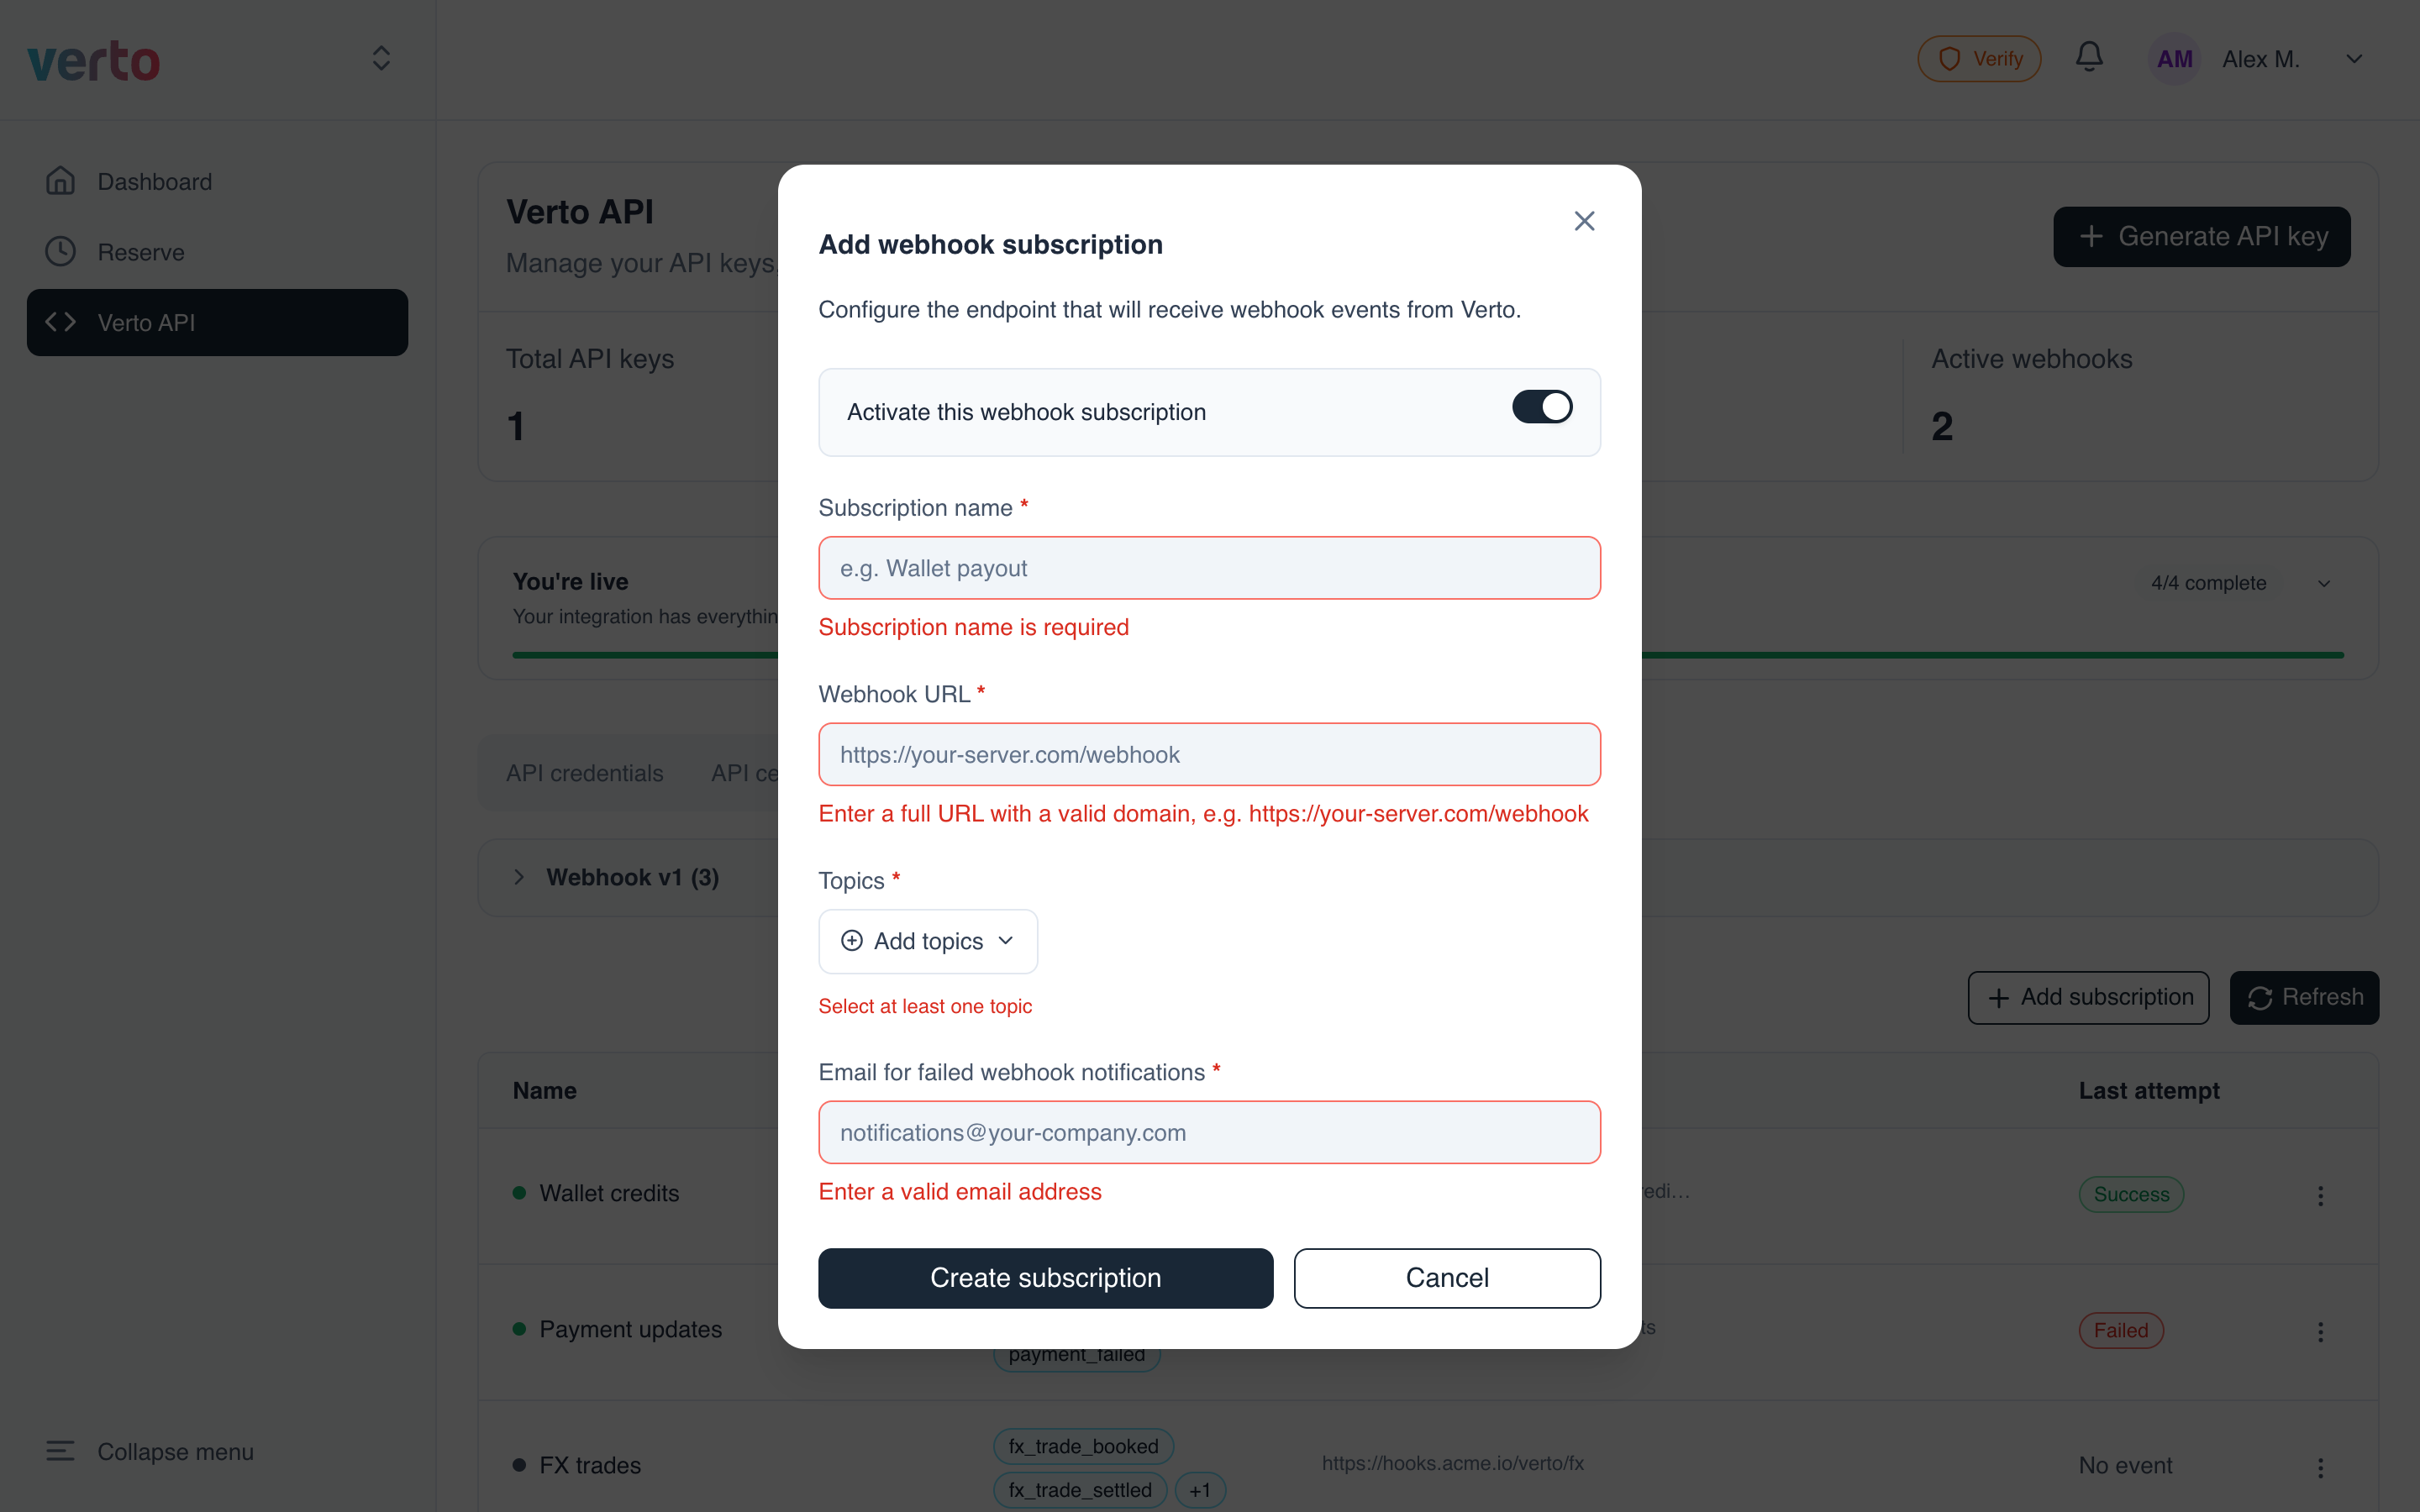
If a field is missing or invalid, the form points it out when you submit:
The new subscription appears at the top of the list. There is no success message; the new row confirms it worked. If Verto rejects the request, an error message appears at the top of the screen.
Next: test itOnce the subscription is created, send a test event to confirm your endpoint is reachable.
Updated 14 days ago
Did this page help you?